Home>How-To Guides>Tips and Tricks>Mastering Subtitles with Final Cut Pro


Tips and Tricks
Mastering Subtitles with Final Cut Pro
Modified: September 5, 2024
Learn valuable tips and tricks for mastering subtitles with Final Cut Pro. Enhance your video editing skills and create professional-looking subtitles effortlessly.
(Many of the links in this article redirect to a specific reviewed product. Your purchase of these products through affiliate links helps to generate commission for Techsplurge.com, at no extra cost. Learn more)
Table of Contents
Why Subtitles and Captions Matter
Subtitles and captions play a vital role in video content creation. They:
- Provide accessibility for the hearing-impaired audience
- Help viewers who prefer watching videos without sound
- Enhance the overall viewing experience by providing additional context
Choosing the Right Format
When adding subtitles and captions in Final Cut Pro X (FCPX), two primary formats are available: SRT (SubRip Text) and CEA-608.
- SRT: Widely supported by platforms like Facebook, YouTube, and Vimeo. Simple and easy to read, each caption contains a number, start and end timecode, and one or more lines of text with HTML tags.
- CEA-608: Commonly used in broadcasting and web video production. Allows for more advanced formatting options such as position, color, and formatting.
Adding Subtitles in Final Cut Pro X
Step 1: Importing Your Files
- Open your project in FCPX.
- Go to
File>Import>Caption. - Choose your SRT file from the file browser.
- Click
Importto add the captions to your project.
Step 2: Re-adjusting if Necessary
- Select and drag titles to move them. Avoid placing subtitles on top of others.
- Trim subtitles by grabbing the end of the caption block and dragging it.
- Duplicate a caption by holding
Alt(orOptionon Mac) and dragging the title. - Delete a caption by selecting it and hitting
Backspace.
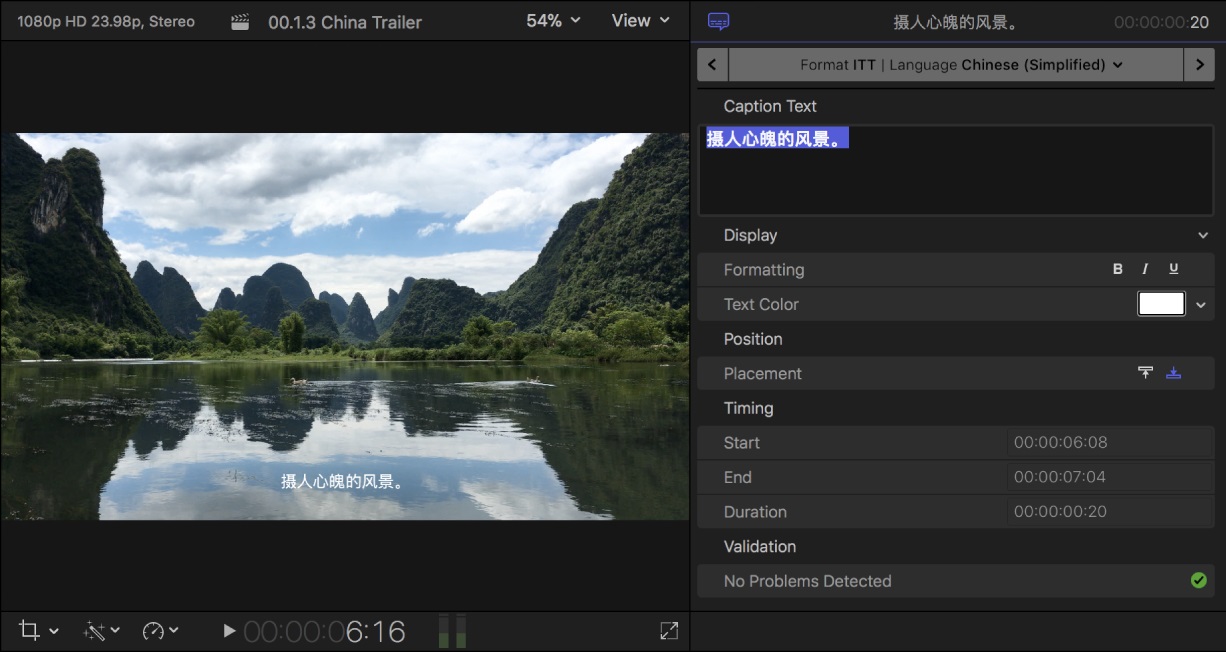
Step 3: Customizing Your Captions
- Select the captions you want to format.
- Change the font style, size, and color using the Caption inspector.
- Adjust the placement of subtitles from the bottom to the top as needed.
- Change the color of captions for multiple speakers.
- Use Bold, Italic, and Underline to emphasize specific parts of your text.
Advanced Customization with CEA-608 Captions
- Select one or more CEA-608 caption clips in the timeline.
- Open the Caption inspector by choosing
Window>Show in Workspace>Inspectoror clicking the Inspector button on the right side of the toolbar. - Change the style and formatting of caption text in the Caption inspector.
- Split a CEA-608 caption into multiple fields for handling multiple speakers or complex dialogue.
Adding Multiple Languages
- Duplicate captions for a different language by selecting each caption and going to
Edit>Captions>Duplicate Captions to New Language. - Translate each caption to match the new language.
Automatic Transcription with Veed
- Open Veed and upload your video.
- Go to the
Subtitlessection and select theAuto Subtitlingtool. - Choose the language spoken in the video and hit
Start. - Download the subtitles file or burn them into your video directly in FCPX.
Exporting Captions
- Go to
Sharein the top right corner and select your preferred export preset. - Select
Roles>Captionsand choose your captions to be burnt into the video. - Select your destination and export the video.
Tips for Mastering Subtitles
- Choose the right format (SRT or CEA-608) based on your needs.
- Adjust the timings of your captions carefully to avoid errors.
- Customize the fonts and colors of your captions for visual appeal.
- Add multiple languages to reach a wider audience.
- Use automatic transcription tools like Veed to save time.

