
Home>Reviews>Gadgets>Clearing the Chromecast Cache: A Step-by-Step Guide
Gadgets
Clearing the Chromecast Cache: A Step-by-Step Guide
Modified: September 5, 2024
Learn how to clear the cache on your Chromecast in a few simple steps. Keep your gadgets running smoothly with our easy guide.
(Many of the links in this article redirect to a specific reviewed product. Your purchase of these products through affiliate links helps to generate commission for Techsplurge.com, at no extra cost. Learn more)
Table of Contents
Clearing the Chromecast Cache: A Step-by-Step Guide
In modern entertainment, Chromecast has become a game-changer, transforming how we consume digital content. Whether streaming favorite shows, indulging in immersive gaming, or sharing cherished memories, Chromecast seamlessly integrates into daily life. However, like any digital device, occasional glitches or performance hiccups can occur. One common troubleshooting technique is clearing the Chromecast cache.
The cache, a temporary storage location for frequently accessed data, enhances the speed and efficiency of various applications on Chromecast. Over time, the cache can accumulate redundant or outdated information, leading to performance issues such as slow loading times, buffering interruptions, or app crashes. Understanding how to clear the Chromecast cache is valuable for users seeking to optimize their streaming experience.
Understanding the Chromecast Cache
Before diving into the steps to clear the cache, it's essential to understand what the cache is and why it's necessary. The cache is a temporary storage location where frequently accessed data is stored. This data can include images, videos, and other multimedia content that your device needs to access quickly. The primary purpose of the cache is to improve performance by reducing the time it takes to load content.
However, over time, the cache can accumulate redundant or outdated information. This can lead to several issues, including:
- Slow Loading Times: Outdated data in the cache can slow down device performance, making it take longer to load apps and stream content.
- Buffering Interruptions: A full cache can cause buffering issues, especially when streaming high-quality content, disrupting your viewing experience.
- App Crashes: In some cases, a cluttered cache can cause apps to crash or malfunction, leading to a poor user experience.
Why Clearing the Chromecast Cache is Important
Clearing the cache on your Chromecast is crucial for maintaining optimal performance. Here are some reasons why you should regularly clear the cache:
- Improved Performance: Removing redundant and outdated data can significantly improve your device's performance, leading to faster app loading times and smoother streaming experiences.
- Reduced Buffering: Clearing the cache reduces the likelihood of buffering interruptions, ensuring that your content streams smoothly without interruptions.
- Prevents App Crashes: Regularly clearing the cache helps prevent app crashes and malfunctions, ensuring that your device operates reliably.
Step-by-Step Guide to Clearing the Chromecast Cache
Step 1: Accessing the Chromecast Settings
To clear the cache on your Chromecast, you need to access the settings menu. Here’s how you can do it:
- Navigate to Home Screen: Start by navigating to the home screen of your Chromecast with Google TV.
- Select Avatar: On the home screen, select your avatar icon located on the top right corner of the screen.
- Access Settings: From the menu that appears, select Settings.
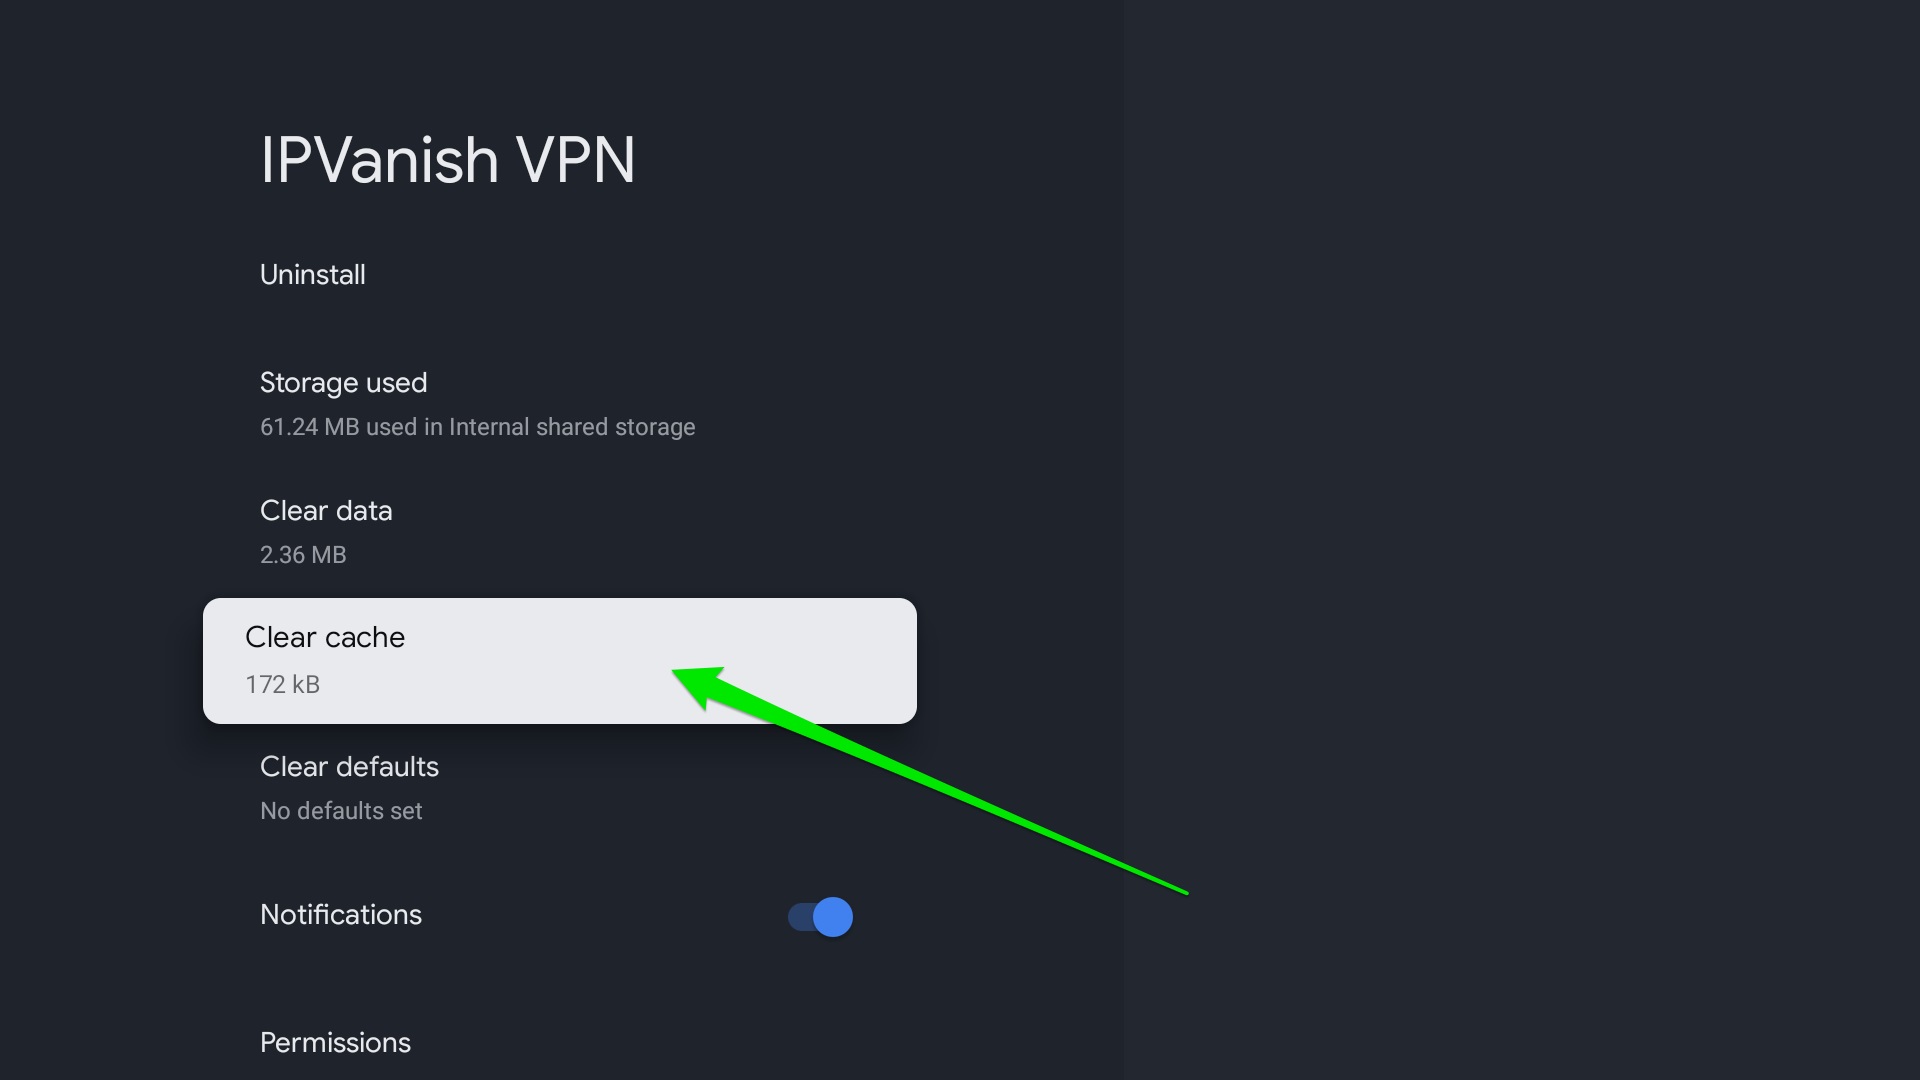
Step 2: Navigating to Cache Clearing Option
Once in the settings menu, follow these steps to navigate to the cache clearing option:
- Select Apps: In the settings menu, scroll down and select Apps.
- See All Apps: If the app you want to clear cache for isn’t listed, select See all apps to view all installed apps.
- Select App: Locate the app for which you want to clear cache and select it.
Step 3: Clearing Cache
Now that you have selected the app, follow these steps to clear its cache:
- Clear Cache: Once in the app’s settings, look for an option that says Clear cache or Clear data. Select this option.
- Confirm Action: A confirmation prompt will appear asking if you are sure you want to clear the cache. Click OK to proceed with clearing the cache.
Step 4: Clearing Data (Optional)
In addition to clearing the cache, you may also want to clear the app’s data. This will remove any stored settings and preferences associated with the app.
- Clear Data: After clearing the cache, look for an option that says Clear data. Select this option.
- Confirm Action: A confirmation prompt will appear asking if you are sure you want to clear the data. Click OK to proceed with clearing the data.
Step 5: Verifying Cache Clearance
After clearing both the cache and data, it’s a good idea to verify that the cache has been successfully cleared.
- Check App Performance: Launch the app you just cleared cache for and check if it’s performing smoothly without any issues.
- Check Storage Space: If you have a storage space indicator on your device, check if it shows any significant reduction in storage space after clearing cache and data.
Additional Tips for Maintaining Your Chromecast
While clearing the cache is a crucial maintenance task, there are several other tips you can follow to keep your Chromecast running smoothly:
- Regular Software Updates: Ensure that your Chromecast is running the latest software version. Regular updates often include performance enhancements and bug fixes.
- Restart Device: Sometimes, simply restarting your Chromecast can resolve performance issues. This helps clear out any temporary glitches that might be affecting its performance.
- Uninstall Unused Apps: If you have apps installed that you no longer use, consider uninstalling them. This helps declutter your device and reduces the amount of data that needs to be managed.
- Use VPN Wisely: If you use a VPN, make sure it’s configured correctly. Some VPNs can cause performance issues if not set up properly. Refer to the VPN provider’s instructions for optimal configuration.
Clearing the cache on your Chromecast is a simple yet effective way to maintain optimal performance and ensure a seamless streaming experience. By following the steps outlined in this guide, you can easily clear the cache and data for individual apps, thereby improving your device's overall performance.
Understanding how to clear the Chromecast cache is essential for any user looking to optimize their streaming experience. By regularly clearing the cache and following additional maintenance tips, you can ensure that your Chromecast continues to deliver unparalleled entertainment value.