
Home>How-To Guides>Tips and Tricks>How To Add A Subtitle In Word
Tips and Tricks
How To Add A Subtitle In Word
Modified: September 5, 2024
Learn the best tips and tricks for adding a subtitle in Word with our step-by-step guide. Enhance your documents with subtitles effortlessly!
(Many of the links in this article redirect to a specific reviewed product. Your purchase of these products through affiliate links helps to generate commission for Techsplurge.com, at no extra cost. Learn more)
Table of Contents
Setting Up the Normal Style
Before adding headings and subtitles, set up the normal style of your document. This style will serve as the default font setting for all text that isn't a heading.
Steps to Set Up Normal Style
- Open Microsoft Word: Launch Microsoft Word and create a new document or open an existing one.
- Access the Styles Pane:
- Click on the
HOMEtab. - In the
Stylesgroup, you will see theStylespane. If it's not visible, click on theStylesbutton to open it.
- Click on the
- Modify the Normal Style:
- Right-click on the
Normalstyle in the Styles pane. - Select
Modifyfrom the context menu. - In the
Modify Styledialog box, navigate to theParagraphtab. - Under the
INDENTS AND SPACINGtab, check the box next to "Don't add space between paragraphs of the same style." - Under the
LINE AND PAGE BREAKStab, check the box next to "Widow/Orphan Control." - Click
OKto apply these changes.
- Right-click on the
- Set Font Formatting:
- In the
Modify Styledialog box, navigate to theFonttab. - Select the font you wish to use throughout your document.
- Change the font size to 12 points.
- Ensure the line spacing is double-spaced.
- Remove space between paragraphs by selecting the option indicated by two lines pointing towards each other.
- In the
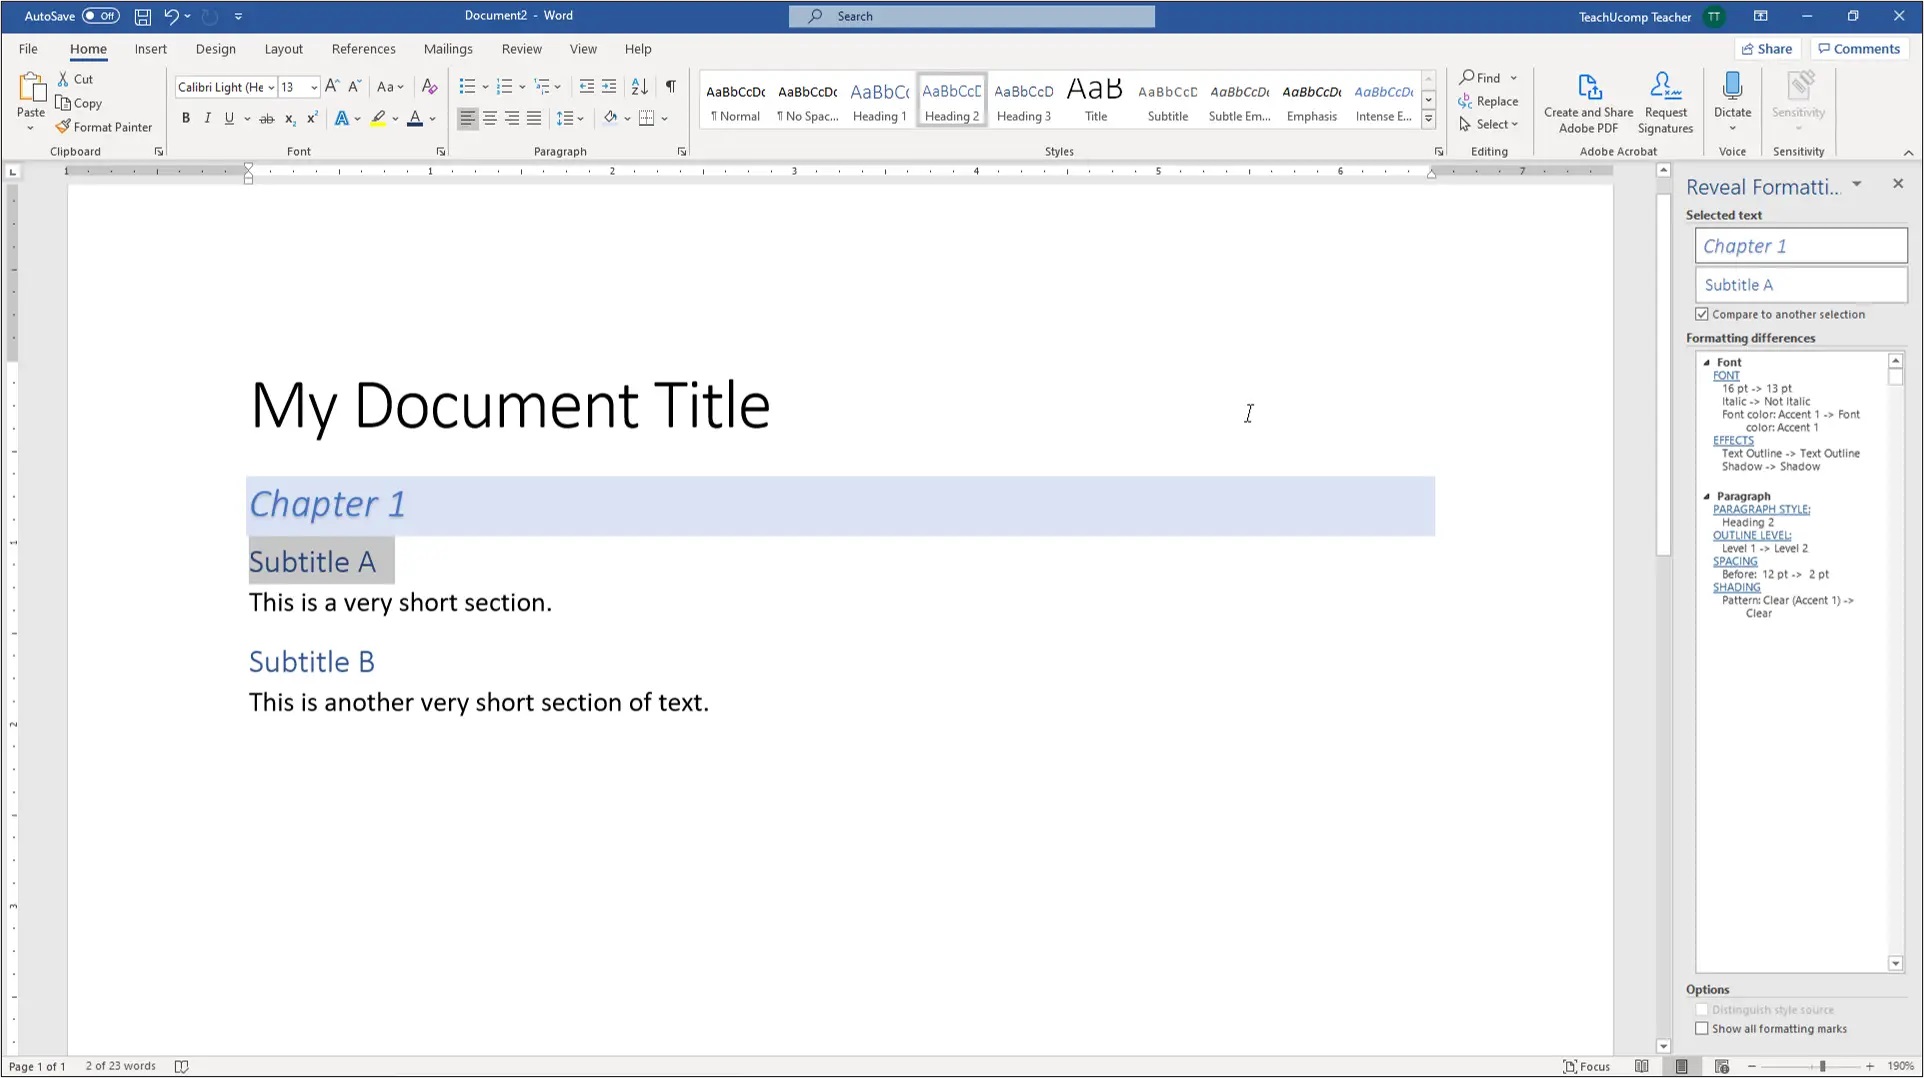
Creating Headings and Subtitles
After setting up your normal style, create headings and subtitles using Word's built-in heading styles.
Steps to Create Headings and Subtitles
- Select Text for Heading:
- Highlight the text you want to use as a heading or subtitle.
- Apply Heading Style:
- Move your pointer over different headings in the Styles gallery on the HOME tab.
- Notice how your text changes as you pause over each style.
- Click on the heading style you want to use. If you don't see the style you want, click the More button to expand the gallery.
- Customizing Heading Styles:
- If you need to customize the font and formatting of a heading style, select the heading text you want to customize.
- Modify its styles as needed.
- Right-click on the heading style that you customized and click Update Heading to Match Selection. This ensures that every time you apply that heading style in your document, it will include your customizations.
Formatting Headings
Here’s how you can format different levels of headings according to APA style, commonly used for academic papers:
Level 1 Headings (Chapters)
- Level 1 headings are typically used for chapters or major sections in your document.
- These headings should be typed in title case, center aligned, and bold.
- The number of the chapter can be in Arabic or Roman numerals or spelled out so long as it is consistently done throughout the document.
- The heading should be on one line, so if you are using chapters, it should look something like this: Chapter 1: Introduction.
Level 2 Headings (Subchapters)
- Level 2 headings are used for subchapters or major sections within chapters.
- These headings should also be typed in title case, left-aligned, and bold.
- They should be formatted similarly to Level 1 headings but without centering.
Level 3 Headings (Subsections)
- Level 3 headings are used for subsections within subchapters.
- These headings should be typed in title case, left-aligned, and italic.
- They should be formatted similarly to Level 2 headings but with italic text.
Level 4 and Level 5 Headings
- Level 4 and Level 5 headings are used for further subsections and should be indented 0.5 inches from the left margin.
- Level 4 headings should be typed in title case and bold font with a period at the end of the heading: Level Four Heading Here.
- Level 5 headings should be typed in title case and bold italic font with a period at the end of the heading: Level Five Heading Here.
Creating a Table of Contents
To create a table of contents in Word, use the Styles function to link your headings and subheadings.
Steps to Create a Table of Contents
- Apply Heading Styles: Ensure that you have applied the appropriate heading styles to your text.
- Update Table of Contents:
- Go to the
REFERENCEStab. - Click on
Table of Contentsin the Table of Contents group. - Select
Custom Table of Contentsfrom the dropdown menu. - In the
Table of Contents Optionsdialog box, ensure that the styles you used for headings are selected. - Click
OKto generate the table of contents.
- Go to the
Manual Formatting for Additional Levels
If you need to go beyond the first three heading levels, format these manually. Each level should be consistently formatted the same way.
Example of Manual Formatting
Here’s an example of how you might manually format a Level 6 heading:
- Level 6 Heading: Indent it further than Level 5, use title case, and bold font. For example: Level Six Heading Here.
Additional Tips
- Consistency: Ensure that all headings and subheadings are consistently formatted throughout your document.
- APA Style: If you're working on an academic paper, adhere to APA style guidelines for formatting headings.
- Customization: Use the Styles pane to customize your heading styles and maintain consistency in your document.
- Table of Contents: Regularly update your table of contents as you add or remove sections in your document.
By following these steps and tips, you can effectively add subtitles and titles in Microsoft Word, making your documents more professional and easier to read.