
Home>Software and Apps>When I Connect To VPN I Lose Internet Windows 11
Software and Apps
When I Connect To VPN I Lose Internet Windows 11
Modified: September 5, 2024
Experiencing internet connectivity issues when connecting to VPN on Windows 11? Learn how to troubleshoot and resolve the problem with software and apps.
(Many of the links in this article redirect to a specific reviewed product. Your purchase of these products through affiliate links helps to generate commission for Techsplurge.com, at no extra cost. Learn more)
Table of Contents
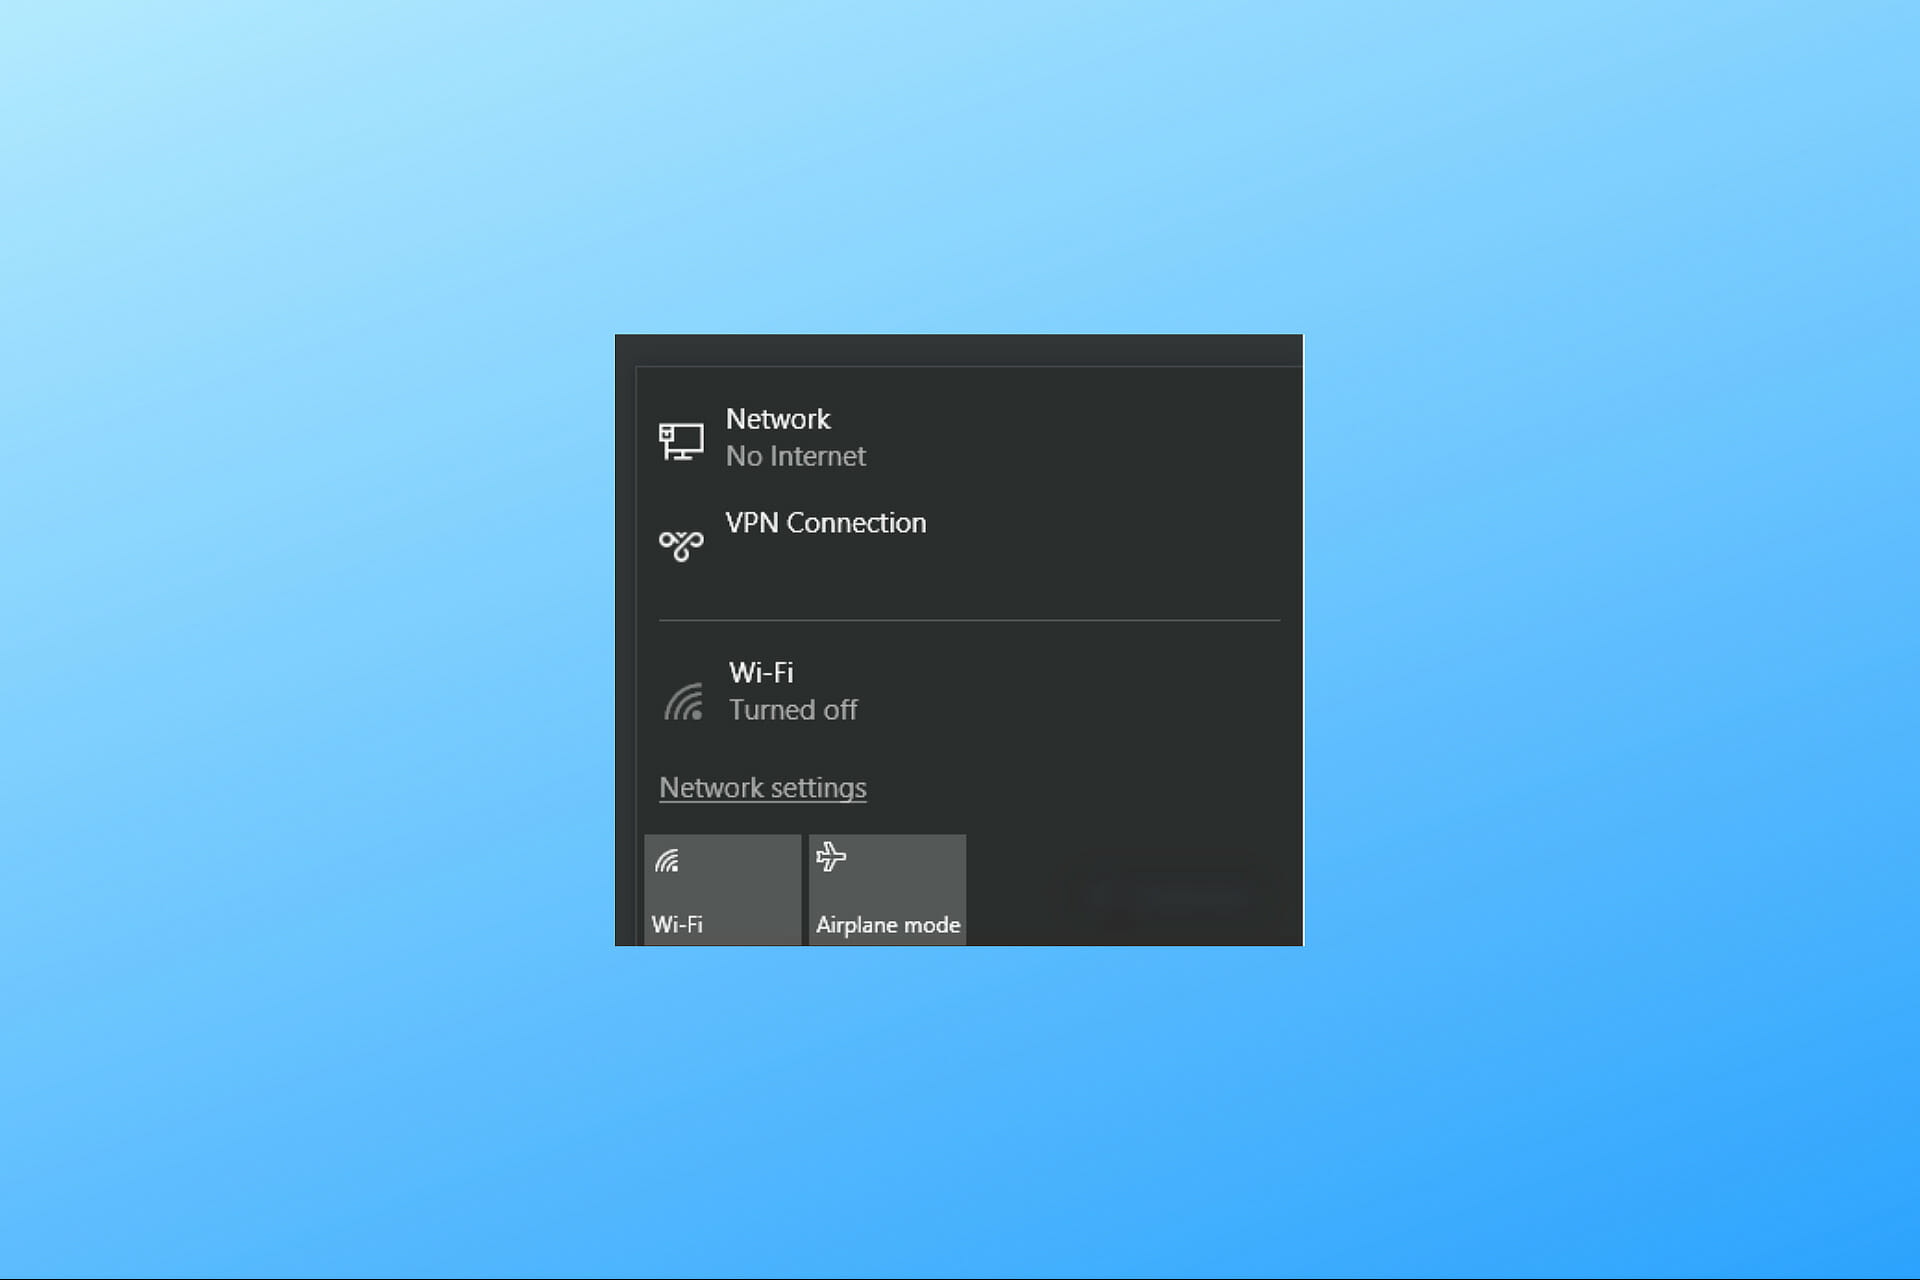
Understanding VPN and Internet Connection Issues
Connecting to a VPN can sometimes disrupt your internet connection. To troubleshoot effectively, it's important to understand how VPNs work and why they might interfere with your connection.
VPN Basics
- Secure Tunnel: A VPN creates an encrypted tunnel between your device and a VPN server, protecting your data from interception.
- Bypassing Restrictions: VPNs help bypass geo-restrictions, access blocked content, and protect against cyber threats.
Internet Connection Interference
- Traffic Routing: When connected to a VPN, all internet traffic routes through the VPN server, which can conflict with local network settings.
- Default Gateway: The default gateway settings on the remote network might override local network settings, causing connectivity issues.
Potential Causes of Internet Connection Loss
Several factors can lead to losing internet connection when using a VPN on Windows 11. Understanding these causes helps in troubleshooting.
Default Gateway Settings
- Override Issues: If the VPN uses the default gateway on the remote network, it may override local network settings, leading to connectivity problems.
TCP/IP Configuration
- Incorrect Settings: Enabling the "Use default gateway on remote network" option might interfere with local network settings, disrupting internet access.
DNS Configuration
- DNS Issues: Improperly configured DNS settings can prevent internet access through the VPN.
Network Adapter Settings
- Misconfigured Adapters: Incorrect network adapter settings can lead to connectivity issues. Ensuring proper configuration and enabling the correct protocols is crucial.
Troubleshooting Steps
To resolve internet connection loss when using a VPN on Windows 11, follow these detailed steps:
Step 1: Check VPN Connection Properties
-
Open Network & Internet Settings:
- Click the Windows Start button and select Settings.
- Under Settings, select Network & Internet.
- Select VPN on the right.
-
Edit VPN Connection:
- Click the VPN connection you want to edit.
- Right-click the VPN connection and select Properties.
-
Networking Tab:
- In the Properties window, select the Networking tab.
- Ensure Internet Protocol (TCP/IP) is selected in the Components checked are used by this connection list.
- Click Properties.
-
TCP/IP Properties:
- In the TCP/IP Properties window, select the Advanced button.
- Go to the IP Settings tab and uncheck the box next to Use default gateway on remote network.
- Click OK to save changes and close the TCP/IP Properties window.
Step 2: Configure DNS Settings
-
Open TCP/IP Properties:
- Follow steps 2-3 from Step 1 to open the TCP/IP Properties window.
-
DNS Tab:
- In the TCP/IP Properties window, select the DNS tab.
- Ensure the correct DNS server addresses are entered. If using a private network, append specific DNS suffixes (e.g., "uwsp.edu").
-
Save Changes:
- Click OK to save changes and close the TCP/IP Properties window.
Step 3: Check Network Adapter Settings
-
Open Network Connections:
- Click the Windows Start button and select Settings.
- Under Settings, select Network & Internet.
- Select Advanced network settings on the right.
- In the More Settings box, select More network adapter options.
-
Right-Click VPN Connection:
- In the Network Connections window, right-click your VPN connection and select Properties.
-
Networking Tab:
- In the Properties window, select the Networking tab.
- Ensure Internet Protocol Version 6 (IPv6) and Internet Protocol Version 4 (IPv4) are selected and their properties are configured correctly.
- Go to each protocol's properties and uncheck the box next to Use default gateway on remote network.
-
Save Changes:
- Click OK to save changes and close the Properties window.
Additional Troubleshooting Tips
-
Restart Your Computer:
- Restarting your computer can reset network settings and resolve conflicts caused by misconfigured settings.
-
Disable and Re-enable VPN Connection:
- Disabling and re-enabling your VPN connection can reset the connection and resolve issues.
-
Check for Updates:
- Ensure your operating system and VPN software are up-to-date. Updates often include bug fixes and improvements that can resolve connectivity issues.
-
Contact VPN Provider Support:
- If none of the above steps resolve the issue, contact your VPN provider's support team for further assistance.