
Home>Software and Apps>How To Uninstall VPN Unlimited
Software and Apps
How To Uninstall VPN Unlimited
Modified: September 5, 2024
Learn how to properly uninstall VPN Unlimited and remove it from your device. Get step-by-step instructions for removing software and apps effortlessly.
(Many of the links in this article redirect to a specific reviewed product. Your purchase of these products through affiliate links helps to generate commission for Techsplurge.com, at no extra cost. Learn more)
Table of Contents
Why Uninstall VPN Unlimited?
Understanding the reasons behind uninstalling VPN Unlimited can help clarify your decision. Here are some common reasons:
- Performance Issues: Slow speeds or frequent disconnections might prompt you to uninstall.
- Privacy Concerns: Some users may feel uneasy about their internet traffic being routed through a VPN service.
- Changes in Internet Usage: Altered internet habits might reduce the need for VPN protection.
- Compatibility Issues: Conflicts with other software or applications may necessitate removal.
Preparing for Uninstallation
Before starting the uninstallation process, ensure your system is ready:
- Revo Uninstaller Pro: Download this powerful uninstaller tool from its official website.
- Windows Settings: Ensure access to the Windows Settings app for managing installed applications.
- Installation Folder: Locate the VPN Unlimited installation folder, usually found in
C:Program FilesorC:Program Files (x86).
Step-by-Step Uninstallation Guide
Using Revo Uninstaller Pro
- Download and Install: Get Revo Uninstaller Pro from the official website.
- Open Revo Uninstaller Pro: Launch the tool and navigate to the "Logs Database" module.
- Search for VPN Unlimited Logs: Type "VPN Unlimited" in the search field and select the appropriate log for your Windows version.
- Import Logs: Click the "Uninstall" button to import the logs into Revo Uninstaller Pro.
- Start Uninstallation: Follow the main uninstall dialog to complete the process.
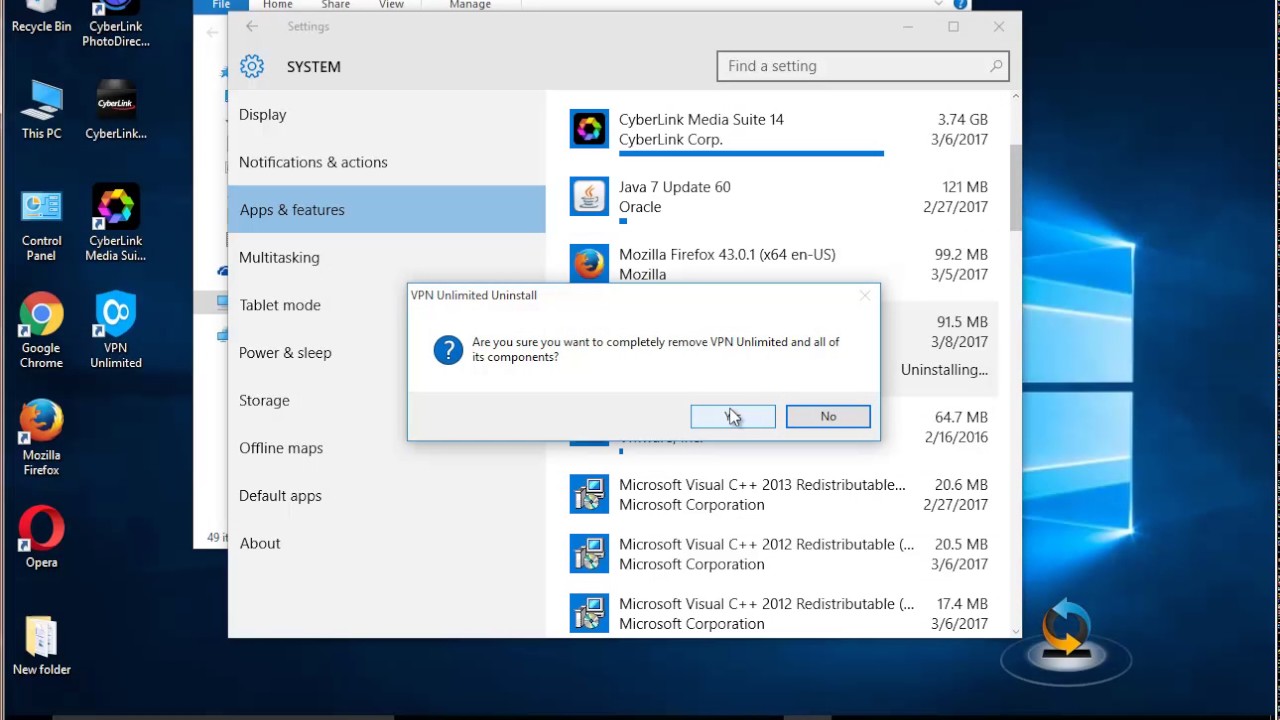
Using Windows Settings
- Open Windows Settings: Access the Settings app from the Start Menu.
- Navigate to Apps & Features: Go to "Apps & Features" within the Settings app.
- Find VPN Unlimited: Locate VPN Unlimited in the list of installed applications.
- Select and Uninstall: Click on VPN Unlimited, then hit the "Uninstall" button.
Manual Uninstallation
For those preferring a manual approach or if other methods fail:
- Locate Installation Folder: Find the installation folder, typically in
C:Program FilesorC:Program Files (x86). - Find Uninstall Files: Look for
uninstall.exeoruninst000.exewithin the folder. - Run Uninstall File: Double-click the uninstall file to initiate the process.
- Follow Instructions: Adhere to any prompts or instructions during uninstallation.
Using Run Command
If issues arise with uninstaller files, use the Run command:
-
Open Run Command: Press Windows + R keys to open the Run command.
-
Enter Uninstallation String: Paste the following string and click OK:
"C:Program Files (x86)VPN Unlimitedunins000.exe"
-
Follow Instructions: Follow any prompts or instructions that appear.
Troubleshooting Common Issues
Uninstalling software can sometimes be tricky. Here are solutions to common problems:
Incomplete Uninstallation
If issues arise during uninstallation, it might be due to incomplete removal.
Solution: Use Revo Uninstaller Pro to thoroughly remove the program, detecting and eliminating leftover files and registry entries.
Uninstallation Logs
If Revo Uninstaller Pro doesn't find logs for VPN Unlimited, manual deletion may be necessary.
Solution: Delete all files and subfolders related to VPN Unlimited from the installation folder. Use a registry cleaner to remove remaining registry entries.
Uninstallation Errors
Errors like access denied messages or other issues could stem from system permissions or corrupted files.
Solution: Run the uninstallation process as an administrator by right-clicking the uninstall file and selecting "Run as administrator." If this fails, restart your computer and try again.
Post-Uninstallation Steps
After successfully uninstalling VPN Unlimited, take these steps to ensure your system is clean:
- Check for Remaining Files: Manually inspect the installation folder and other directories for leftover files.
- Clear Browser Cache: Remove any cookies or data related to VPN Unlimited by clearing your browser cache.
- Update Antivirus Software: Ensure your antivirus software is updated to detect and remove potential malware introduced by VPN Unlimited.
By following these steps and troubleshooting common issues, you can ensure a complete and safe removal of VPN Unlimited from your system. If difficulties persist or specific questions arise, feel free to ask in the comments below.